The Easiest and Best Homemade Pizza Dough Recipe
If there was ever a food that was in a league of its own, it would have to be the pizza. I mean come on… pizza has so much going for it! First, let’s talk about its versatility. Pizza has to probably be the most versatile food on the planet, here’s why. You can eat pizza anytime. It’s an appropriate meal to have at lunch and supper (and in my younger party days, breakfast pizza was also a thing). Pizza is delicious both hot and cold. You don’t need a fork or knife to eat it (but utensils are permitted if you’re feeling fancy). And let’s not even get started on the fact that most types of pizza cover the 4 food groups! So, ya – because of all that, I think pizza is pretty amazing. And that’s probably the reason why my go-to dish to serve dinner guests is my homemade pizza recipe. Because who doesn’t like pizza, am I right!?
I don’t usually proclaim that I’m a guru when it comes to many things. But I do think that I’m on the path to pizza guru-dom. I make homemade pizza quite a bit (at least once every 1-2 weeks). Homemade pizza is such a winner in our house because it’s healthy, easy to make, and everyone loves it!
Homemade Pizza Is Really Easy To Make!
Now, I know that making homemade pizza can be intimidating at first. But the key is to have an amazingly easy pizza dough recipe. So I’m going to share the best pizza dough recipe that I’ve come across (and I’ve tried my share of pizza dough duds). Along with some pizza making tips and tricks that I’ve figured out. So, who’s going to try and make homemade pizza with me?!
Easy Homemade Pizza Dough
Yields 2 large pizzas
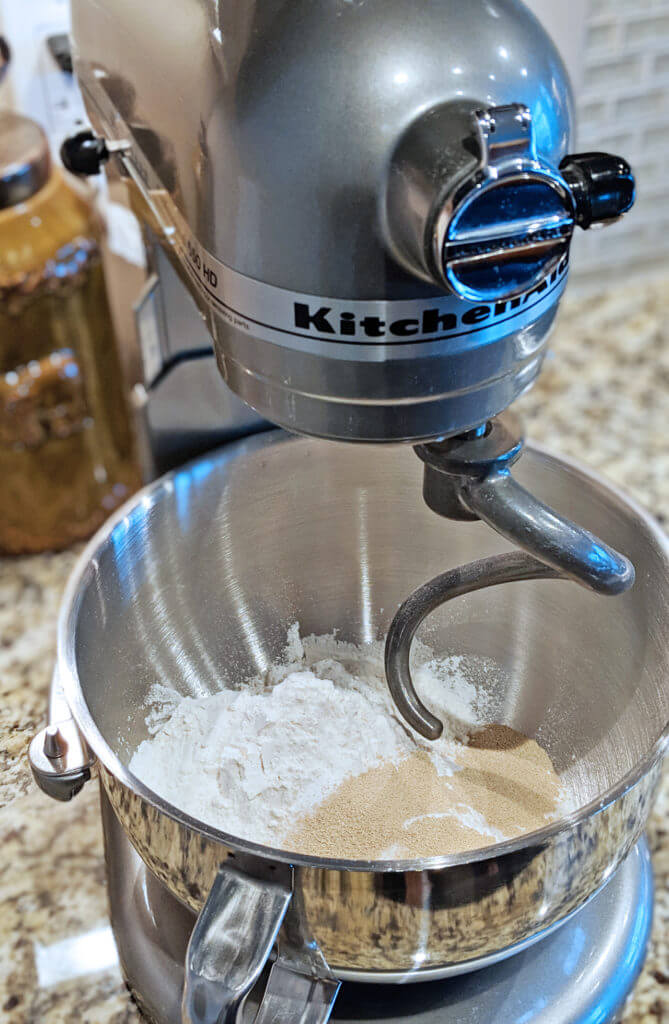
In a stand mixer combine all of the dry ingredients (flour, sugar, yeast, salt). Turn the mixer onto a low-speed setting to mix the dry ingredients.

In a separate bowl, add together the warm water and 2 TBSP of olive oil.
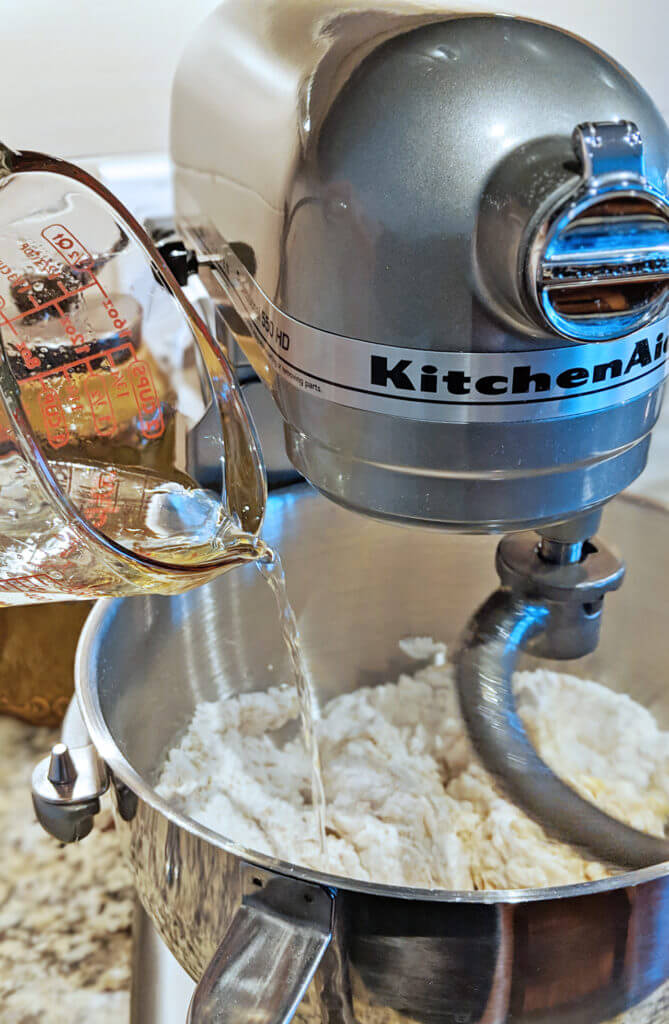
While the mixer is still mixing the dry ingredients, slowly add the water/oil to the dry mixture.
* Make sure your water is warm, not hot as hot water will kill the yeast which will prevent the dough from rising.

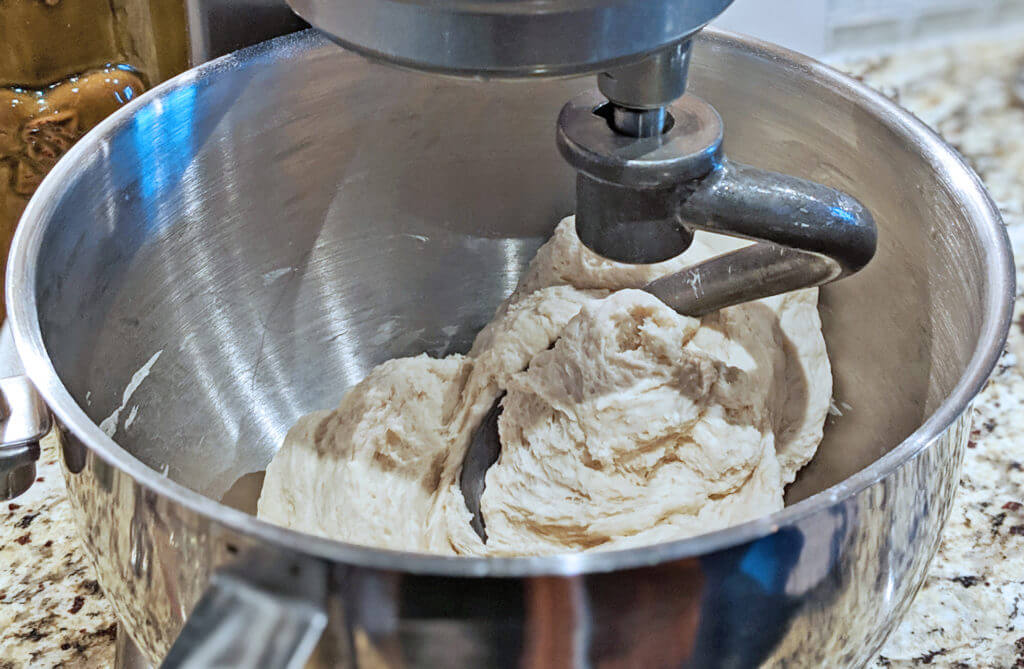
As the dough mixes, you can turn the mixer up to a higher speed setting. Continue to mix the dough until it forms into a smooth ball (usually a few minutes on medium speed). If you find the dough too dry, add an additional 1 tsp of water at a time. If you find it too stick, add 1 tsp of flour at a time until the dough forms a nice ball.

Grease 2 medium sized bowls with the remaining olive oil. 1/2 TBSP of olive oil in each bowl. Divide the dough in half and on a clean and lightly floured surface and gently knead into 2 nice balls. Place the balls into their separate bowls. Roll the balls in the bowls so that they're covered with the olive oil. Cover the bowls with either saran wrap or clean tea towels and leave to let rise for 45 min to 1 hour.
After the time is up, your dough is ready to use.

Preheat your oven to 450 (If you're using a pizza stone, make sure you preheat your oven with the stone in it.
On a large piece of parchment paper (if using a pizza stone for cooking) or on a pizza pan, work your dough into a pizza shape by punching it down working from the center out.

While the dough is rising, I usually like to use the time to prep the toppings, so when the dough is formed into the pizza shape the rest of the toppings are also ready to be added.

Add your toppings to the pizza. We usually layer our pizzas with the sauce toppings, and shredded cheese goes on last.

Place your pizza into the oven for 14 minutes.

If you're using a pizza stone, place the pizza with parchment paper directly onto the stone. After 4 minutes slide the pizza from the parchment onto the stone and continue to bake it for the remaining 10 minutes.

Remove the pizza from oven and enjoy the fruits of your labour!

Ingredients
Directions
In a stand mixer combine all of the dry ingredients (flour, sugar, yeast, salt). Turn the mixer onto a low-speed setting to mix the dry ingredients.

In a separate bowl, add together the warm water and 2 TBSP of olive oil.
While the mixer is still mixing the dry ingredients, slowly add the water/oil to the dry mixture.
* Make sure your water is warm, not hot as hot water will kill the yeast which will prevent the dough from rising.

As the dough mixes, you can turn the mixer up to a higher speed setting. Continue to mix the dough until it forms into a smooth ball (usually a few minutes on medium speed). If you find the dough too dry, add an additional 1 tsp of water at a time. If you find it too stick, add 1 tsp of flour at a time until the dough forms a nice ball.

Grease 2 medium sized bowls with the remaining olive oil. 1/2 TBSP of olive oil in each bowl. Divide the dough in half and on a clean and lightly floured surface and gently knead into 2 nice balls. Place the balls into their separate bowls. Roll the balls in the bowls so that they're covered with the olive oil. Cover the bowls with either saran wrap or clean tea towels and leave to let rise for 45 min to 1 hour.
After the time is up, your dough is ready to use.

Preheat your oven to 450 (If you're using a pizza stone, make sure you preheat your oven with the stone in it.
On a large piece of parchment paper (if using a pizza stone for cooking) or on a pizza pan, work your dough into a pizza shape by punching it down working from the center out.

While the dough is rising, I usually like to use the time to prep the toppings, so when the dough is formed into the pizza shape the rest of the toppings are also ready to be added.

Add your toppings to the pizza. We usually layer our pizzas with the sauce toppings, and shredded cheese goes on last.

Place your pizza into the oven for 14 minutes.

If you're using a pizza stone, place the pizza with parchment paper directly onto the stone. After 4 minutes slide the pizza from the parchment onto the stone and continue to bake it for the remaining 10 minutes.

Remove the pizza from oven and enjoy the fruits of your labour!

Make the pizza dough ahead of time and freeze it for future meals. Just pop it into ziplock bags after it rises and freeze. When you want to use it, just take the dough out and allow it to come to temperature on the counter. Usually, I take mine out at noon if we’re having it for supper.
As always, if you liked this post the biggest compliment you can give me is to leave a comment or share it with your friends. Also find and follow me on Facebook, Pinterest, & Instagram. If you like my blog and don’t want to miss any future posts, sign up to for

Amazing…such a good recipe and the dough was perfect! Definately will be making this again!..Step by step process made it super easy😊
Thanks Alli! I’m glad the recipe worked out for you and that you found it easy and enjoyed your pizza. I’m also glad that you finally got to break in your pizza stone!
This looks so good and doable! My boys are obsessed with pizza they can eat a large just between the two of them and they are only 5 and 3! This will save me so much money just to make it myself! 🙂
Thanks for your comment!!! My boys are also pizza lovers (it’s one of the few meals everyone actually all agrees on). The dough is super easy to make and also freezes great! Let me know what you think when you try it!
This looks so yummy. This seems like a something that I can make easily for my son. Thank you for sharing! I love pizza and trying new recipes.
Give it a try, Janay and let me know what you think!
I love making our own pizzas. I still have not ventured into making my own crust. This recipe seems really easy to make. We may try it this weekend!
Hi Ashley, thanks for looking at the recipe. This pizza crust is really easy to do and tastes amazing! I never ever buy pre-made crust anymore. If you do give it a try, I would love to hear feedback on what you think of it.
Yummm! I’m pinning your recipe. I can’t wait to try it. Have you ever thought of getting an outdoor pizza oven? It’s just something that’s on my wish list. I can just imagine hanging outside in the sunset, with a drink in my hand the kiddos in a tree house (that is also on my wish list) playing… nicely!! I’m sure your recipe would work awesome in it too. One day!! Oh, Plus love the freezing the dough tip! High five!
Jenna, I would LOOOOVVVVEEE an outdoor pizza oven. I’m not sure how practical it would be to have here in Calgary. With our weather, it would be a “short” outdoor pizza making season. lol.
Absolutely yummy and fun. Thanks for sharing
Sandra, you’re welcome! Enjoy!
I like easy peasy recipe.like this one.going to try this
Sudipa
http://www.Asipoflife.com
It’s super easy peasy! Let me know what you think when you do try it.
Ohhhh, I love pizza. I’ve only made my own dough a few times because there’s a local pizza place that sells their dough and it’s just amazing. But it’s definitely one of things I want to master! I’ll have to give this recipe a go.
Lauren | https://www.laurelandiron.com/
Lauren, keep this recipe in your recipe stash for if you ever move! lol
Wonderful idea. I can eat pizza everyday and it can get expensive. Can’t wait to try your recipe.
Thanks, Müge! Let me know if you try the recipe and what you think.