‘Tis The Season For Snowmen!
Before we had kids our home used to look like a showhome. Now, our fridge door is a fine arts museum of finger painting and crayon colourings. Our floors are flooded with toys. And after doing our snowman door craft, our basement door looks like a character out of a Christmas cartoon! If this seems like I’m complaining, I’m not. It’s just now what our house looks like with little people living in it.
Last week we put away all of our Christmas decorations. All, except for one. Back in November, part of our Christmas decor included the kids and I crafting our basement door into an adorable snowman (see below for my easy DIY snowman door decoration instructions). The kids appropriately named our new snowman door decoration, Frosty. It was an insanely EASY craft and the kids LOVED the finished project. And I must admit that I have also enjoyed having another adorable smiling face in the room while puttering around the kitchen.
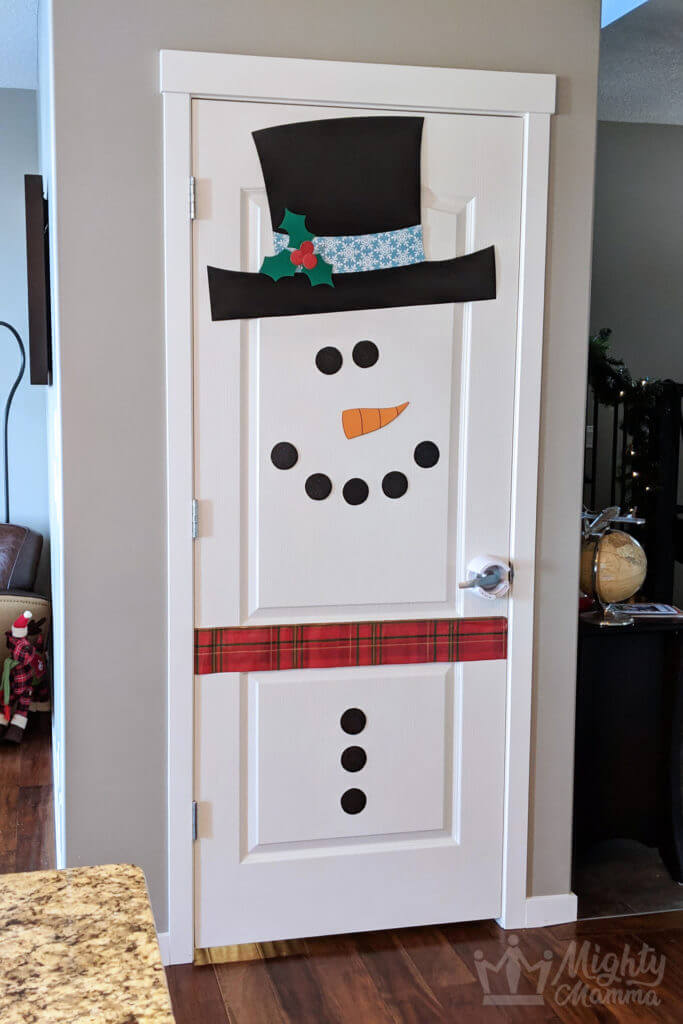
Our snowman included all the trimmings, a carrot nose, lumps of coal for eyes, mouth, and buttons, holly berries in his hat, and a festive red and green plaid scarf. But, because it’s January, it kind of a faux pas to have a Christmas clad snowman hanging around the house. So we decided to give him a makeover.
Because all of the parts of the snowman door decoration are attached using painters tape (painters tape is friendly to our walls), it’s is easy to remove the paper parts of the snowman that we want to swap out. And just like that, we swapped out our door snowman, holly berries for flowers and his plaid scarf for one that is a simple blue pattern. And Voila! It looks like our Frosty won’t be hurrying on his way anytime soon.
I originally found the idea to create a snowman door decoration on Pinterest. But my kids and I decided to add our own flair to our design and created a version that included adding a top at and a few other elements that made our door snowman uniquely ours.
Easy Door Snowman – Snowman Craft
Trace out round black circles for the snowman’s coal eyes and mouth. I found a glass that I thought would be an appropriate size. I traced 8 circles around 2 ½ inches in diameter (5 for the mouth & 3 for coal buttons). I traced 2 slightly larger circles around 3” in diameter for the eyes. I used black glitter paper as it made our snowman’s eyes sparkle in the light.
Draw and cut the shape of a top hat and top hat brim out of the large piece of black poster board.
Out of orange cardstock, freehand and cut out a carrot nose (I also, drew some lines on the nose for more detail.)
Out of other paper of your colour choice freehand and cut out shapes for flowers, leaves, or holly berries.

Cut the scarf from a large piece of gift wrap. Make sure you cut the piece long enough that it goes across the width of the door.
I then used painters tape which I put into a loop (because it’s easy on the finish of our walls and doors) and had the kids help me attach all of our snowman parts to the door.

Ingredients
Directions
Trace out round black circles for the snowman’s coal eyes and mouth. I found a glass that I thought would be an appropriate size. I traced 8 circles around 2 ½ inches in diameter (5 for the mouth & 3 for coal buttons). I traced 2 slightly larger circles around 3” in diameter for the eyes. I used black glitter paper as it made our snowman’s eyes sparkle in the light.
Draw and cut the shape of a top hat and top hat brim out of the large piece of black poster board.
Out of orange cardstock, freehand and cut out a carrot nose (I also, drew some lines on the nose for more detail.)
Out of other paper of your colour choice freehand and cut out shapes for flowers, leaves, or holly berries.
Cut the scarf from a large piece of gift wrap. Make sure you cut the piece long enough that it goes across the width of the door.
I then used painters tape which I put into a loop (because it’s easy on the finish of our walls and doors) and had the kids help me attach all of our snowman parts to the door.
And there you have it, our simple door snowman craft. I hope you like this post. Let me know if you try any of the crafts that I blog about. I love feedback!


As always, if you liked this post the biggest compliment you can give me is to leave a comment or share it with your friends. Also find and follow me on Facebook, Pinterest, & Instagram. If you like my blog and don’t want to miss any future posts, sign up to for
